How I Built a Raspberry Pi Cluster for Cheap
The first step is always the hardest, and so is the first cluster.

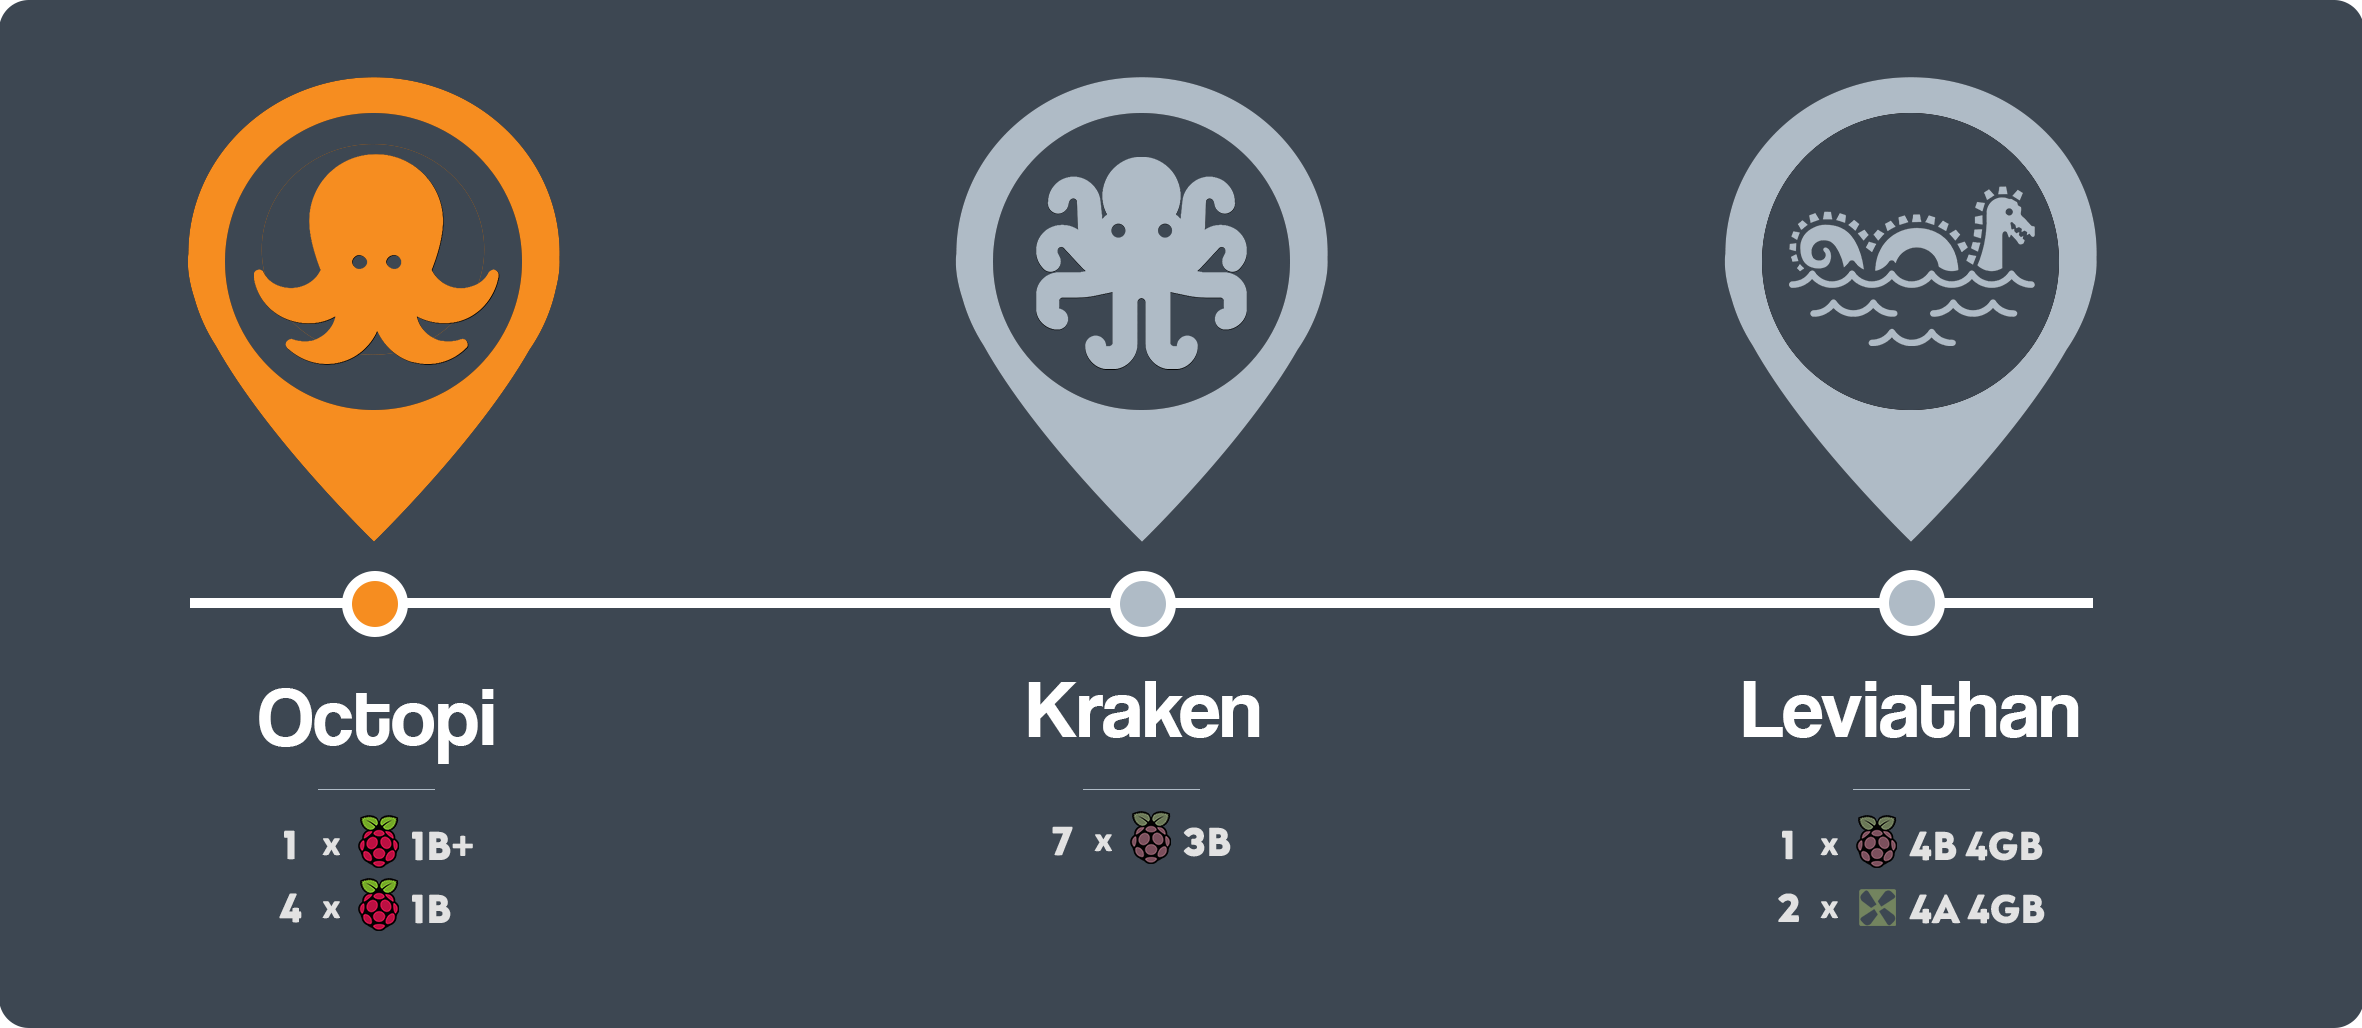
This is the first of the 'How I built' trilogy detailing the build process of all 3 of my clusters.
As you may have already read in my earlier post, I built my first cluster, Octopi in April 2017 for a really superficial reason, if you haven't read it yet, I suggest you do that for a good laugh.
Origins
I chose Octopi, the unsanctioned latin plural of the word Octopus as it's the only word I could think of with a Pi in it. Coincidentally, the prefix 'octo' is also a quantifier, signifying 8 and so I thought it would be interesting to create a ludicrous 8-node Raspberry Pi cluster.
The standard pluralised form of "octopus" in English is "octopuses". The alternative plural "octopi" is considered grammatically incorrect because it wrongly assumes that octopus is a Latin second declension "-us" noun or adjective when, in either Greek or Latin, it is a third declension noun. (Wikipedia)
Lack of budget
I had planned to have 8 nodes to fit the name but eventually found it a little too extravagant given that I was a poor student back in 2017 and I had absolutely no idea what to do with the cluster other than to admire its beauty on my desk.
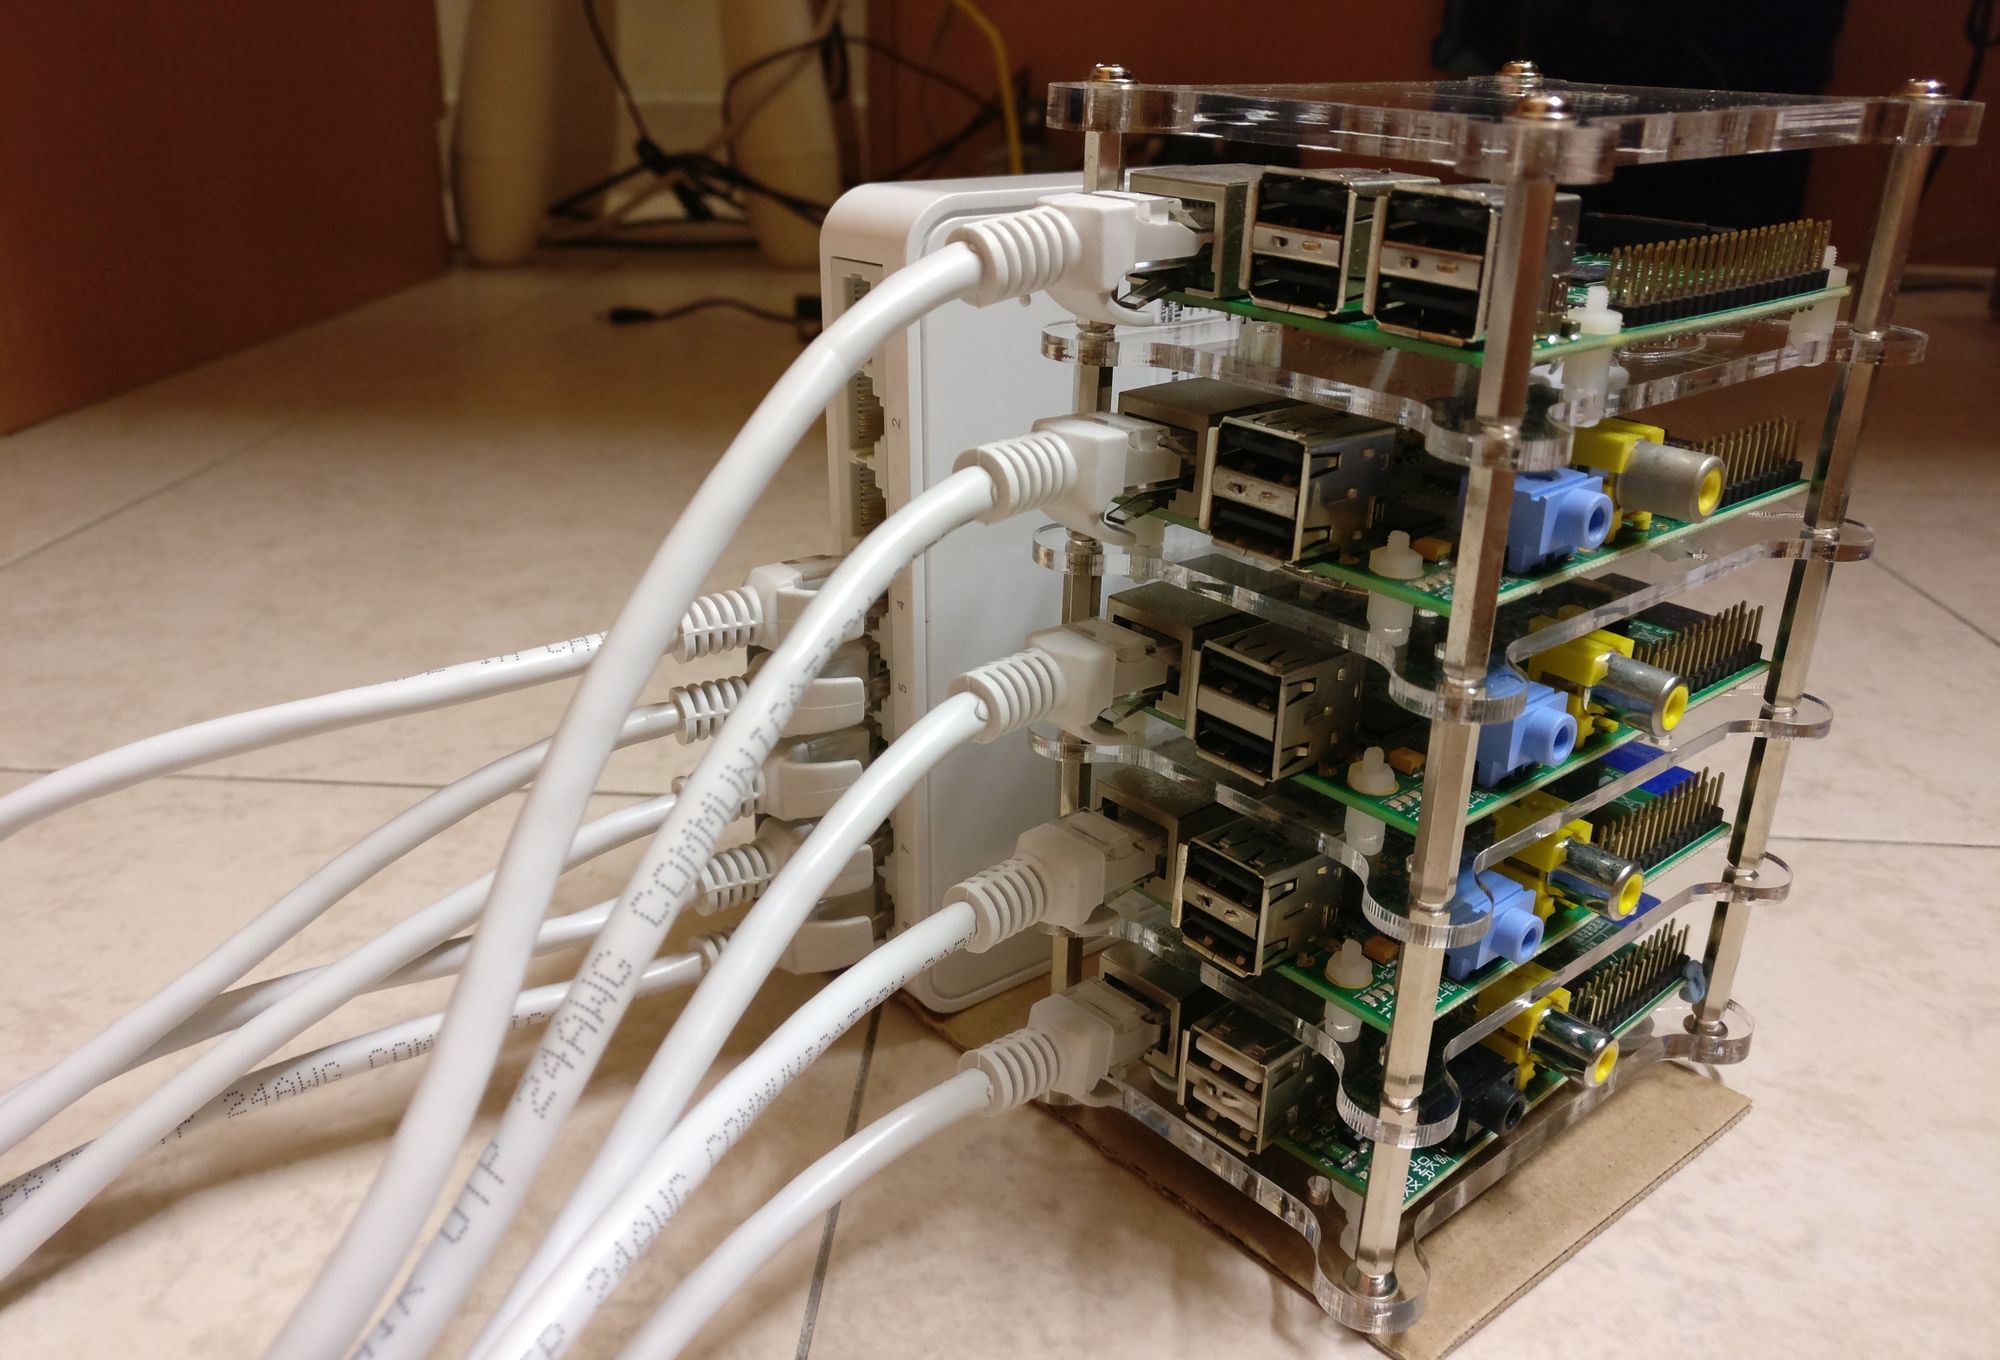
In the end, it was technically a Pentapi as I only managed to procure 5 nodes for cheap off Carousell, but the name stuck nonetheless.
Cluster specifications
| 1 x Raspberry Pi Model B+ | 4 x Raspberry Pi Model B | |
|---|---|---|
| CPU | 1× ARM1176JZF-S 700 MHz | 1× ARM1176JZF-S 700 MHz |
| RAM | 512MB | 512MB |
| USB | 4x USB 2.0 | 2x USB 2.0 |
| Storage | 16GB MicroSD Class 10 | 8GB SD Class 10 |
Janky beginnings
The first cluster wasn't handsome from the beginning. Before it looked the way you're probably already accustomed to by now, it looked like this:
But there's always budget for looks
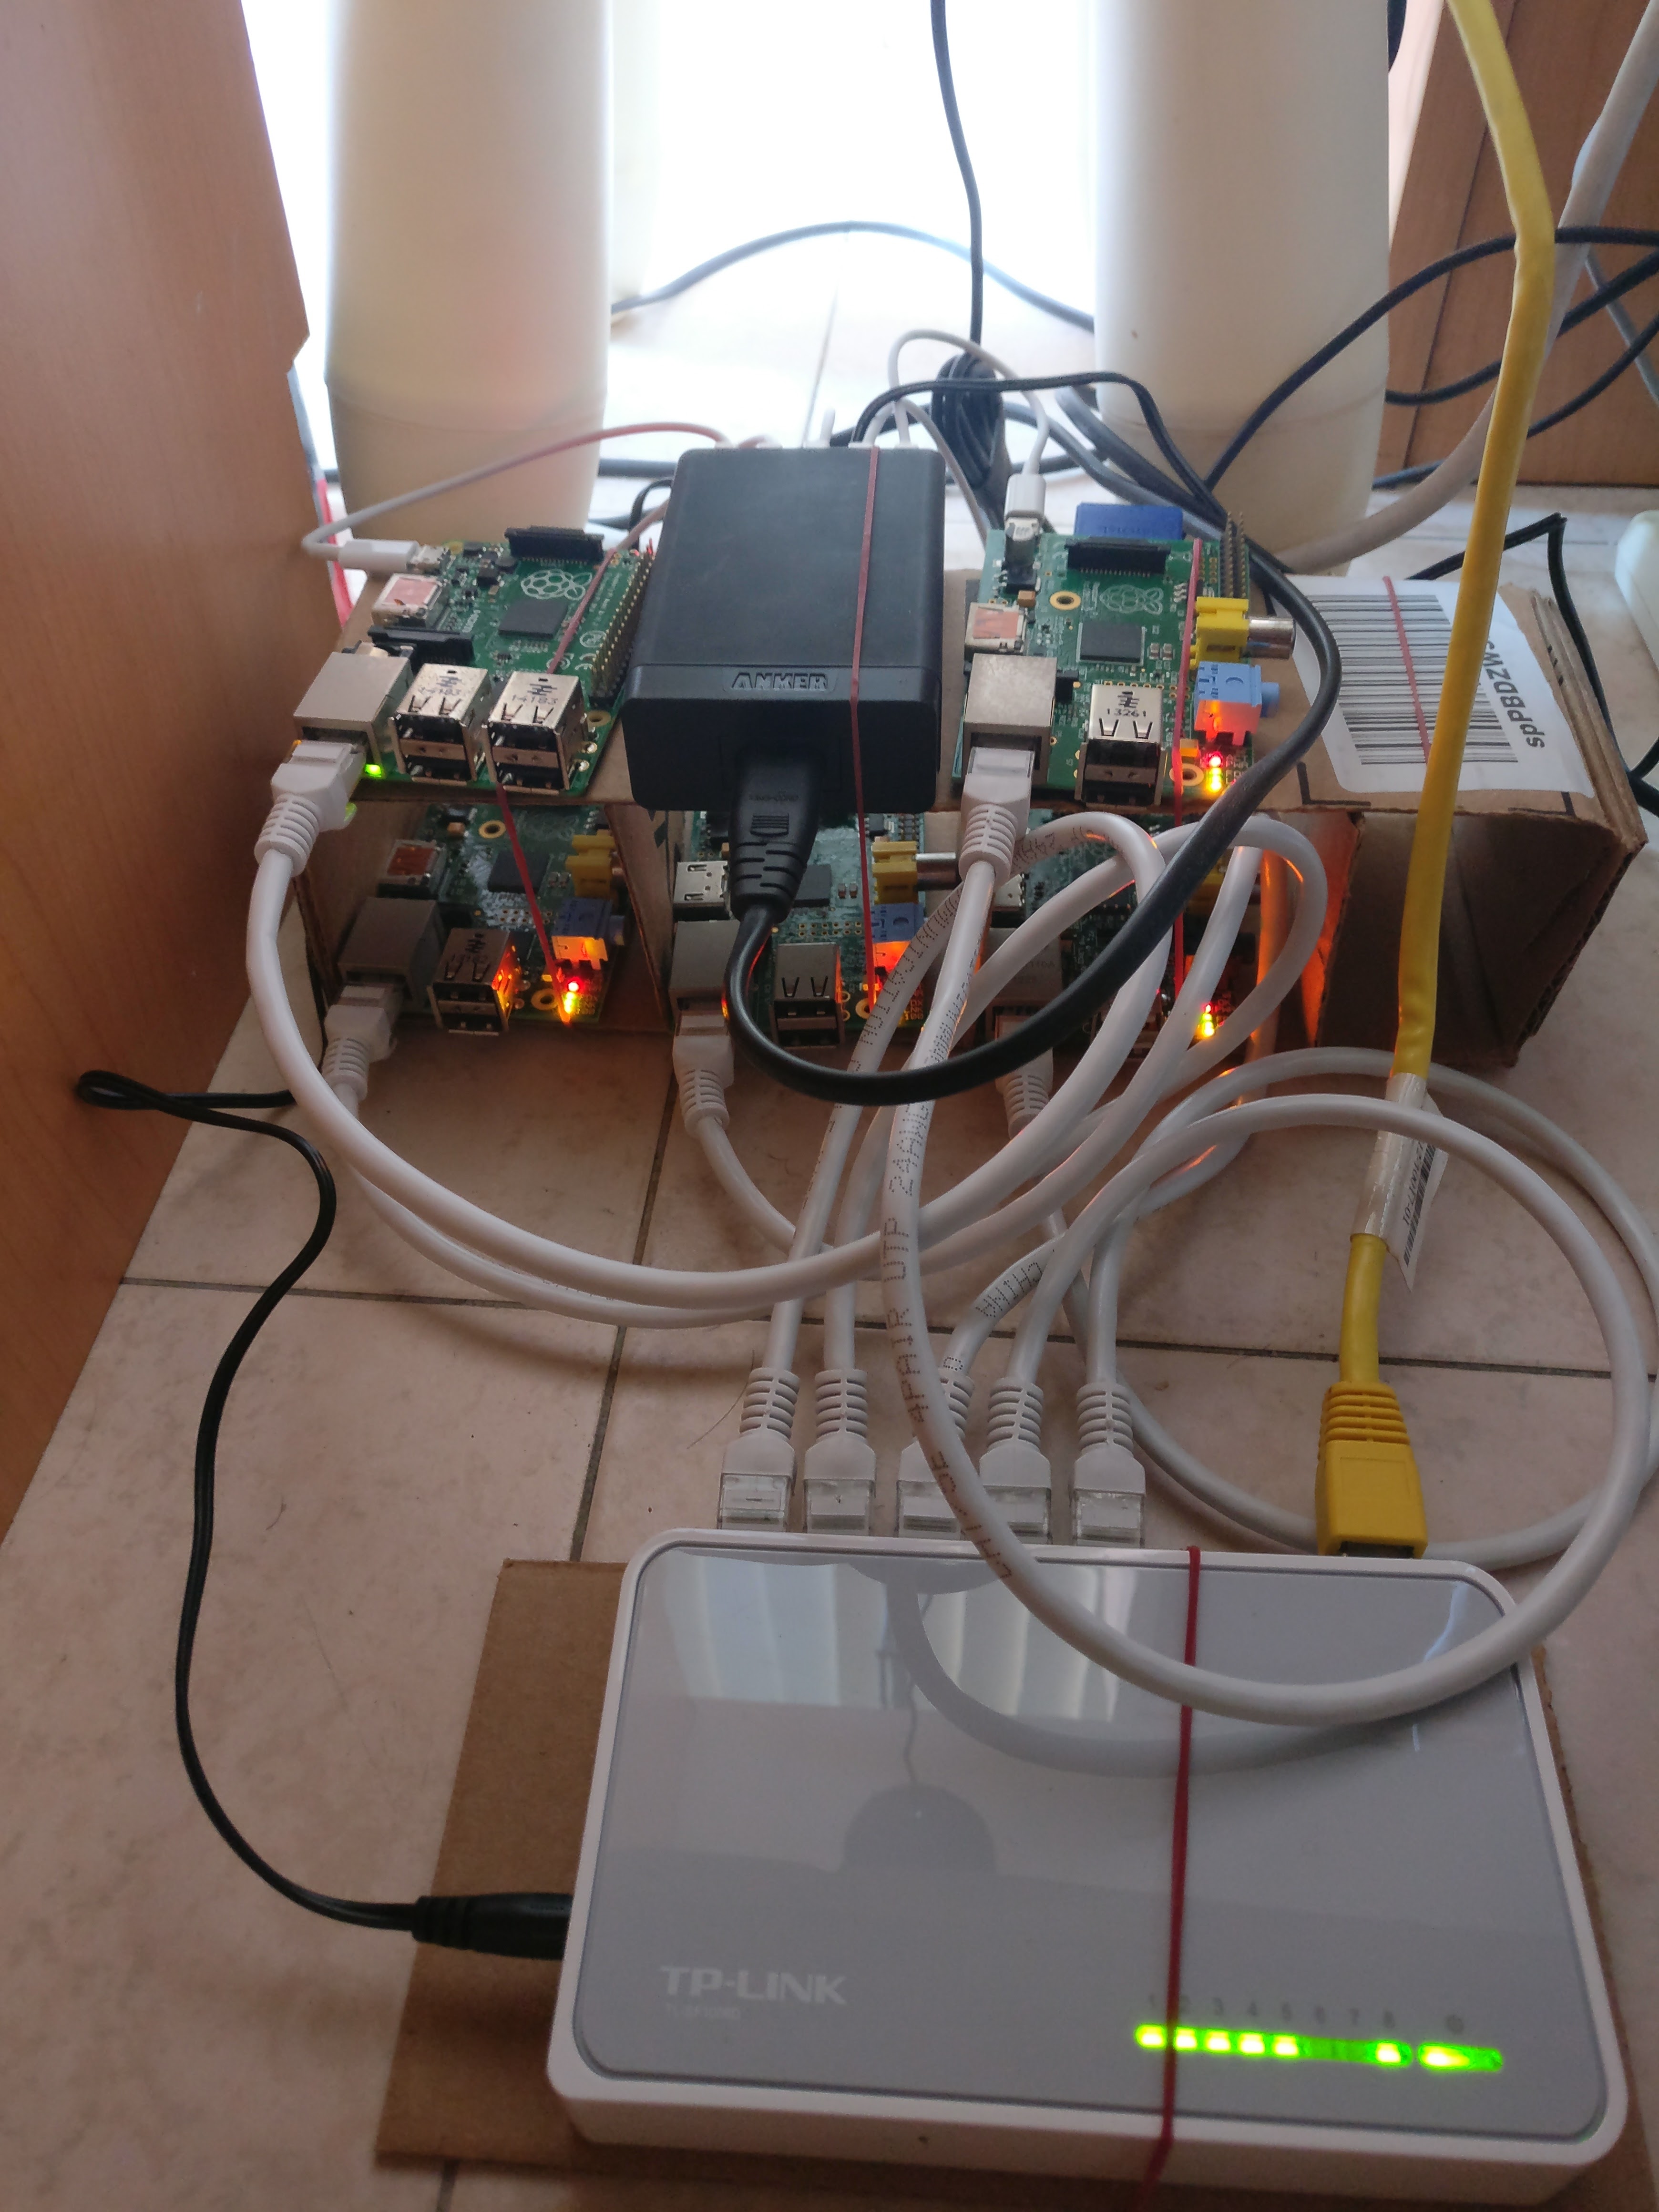
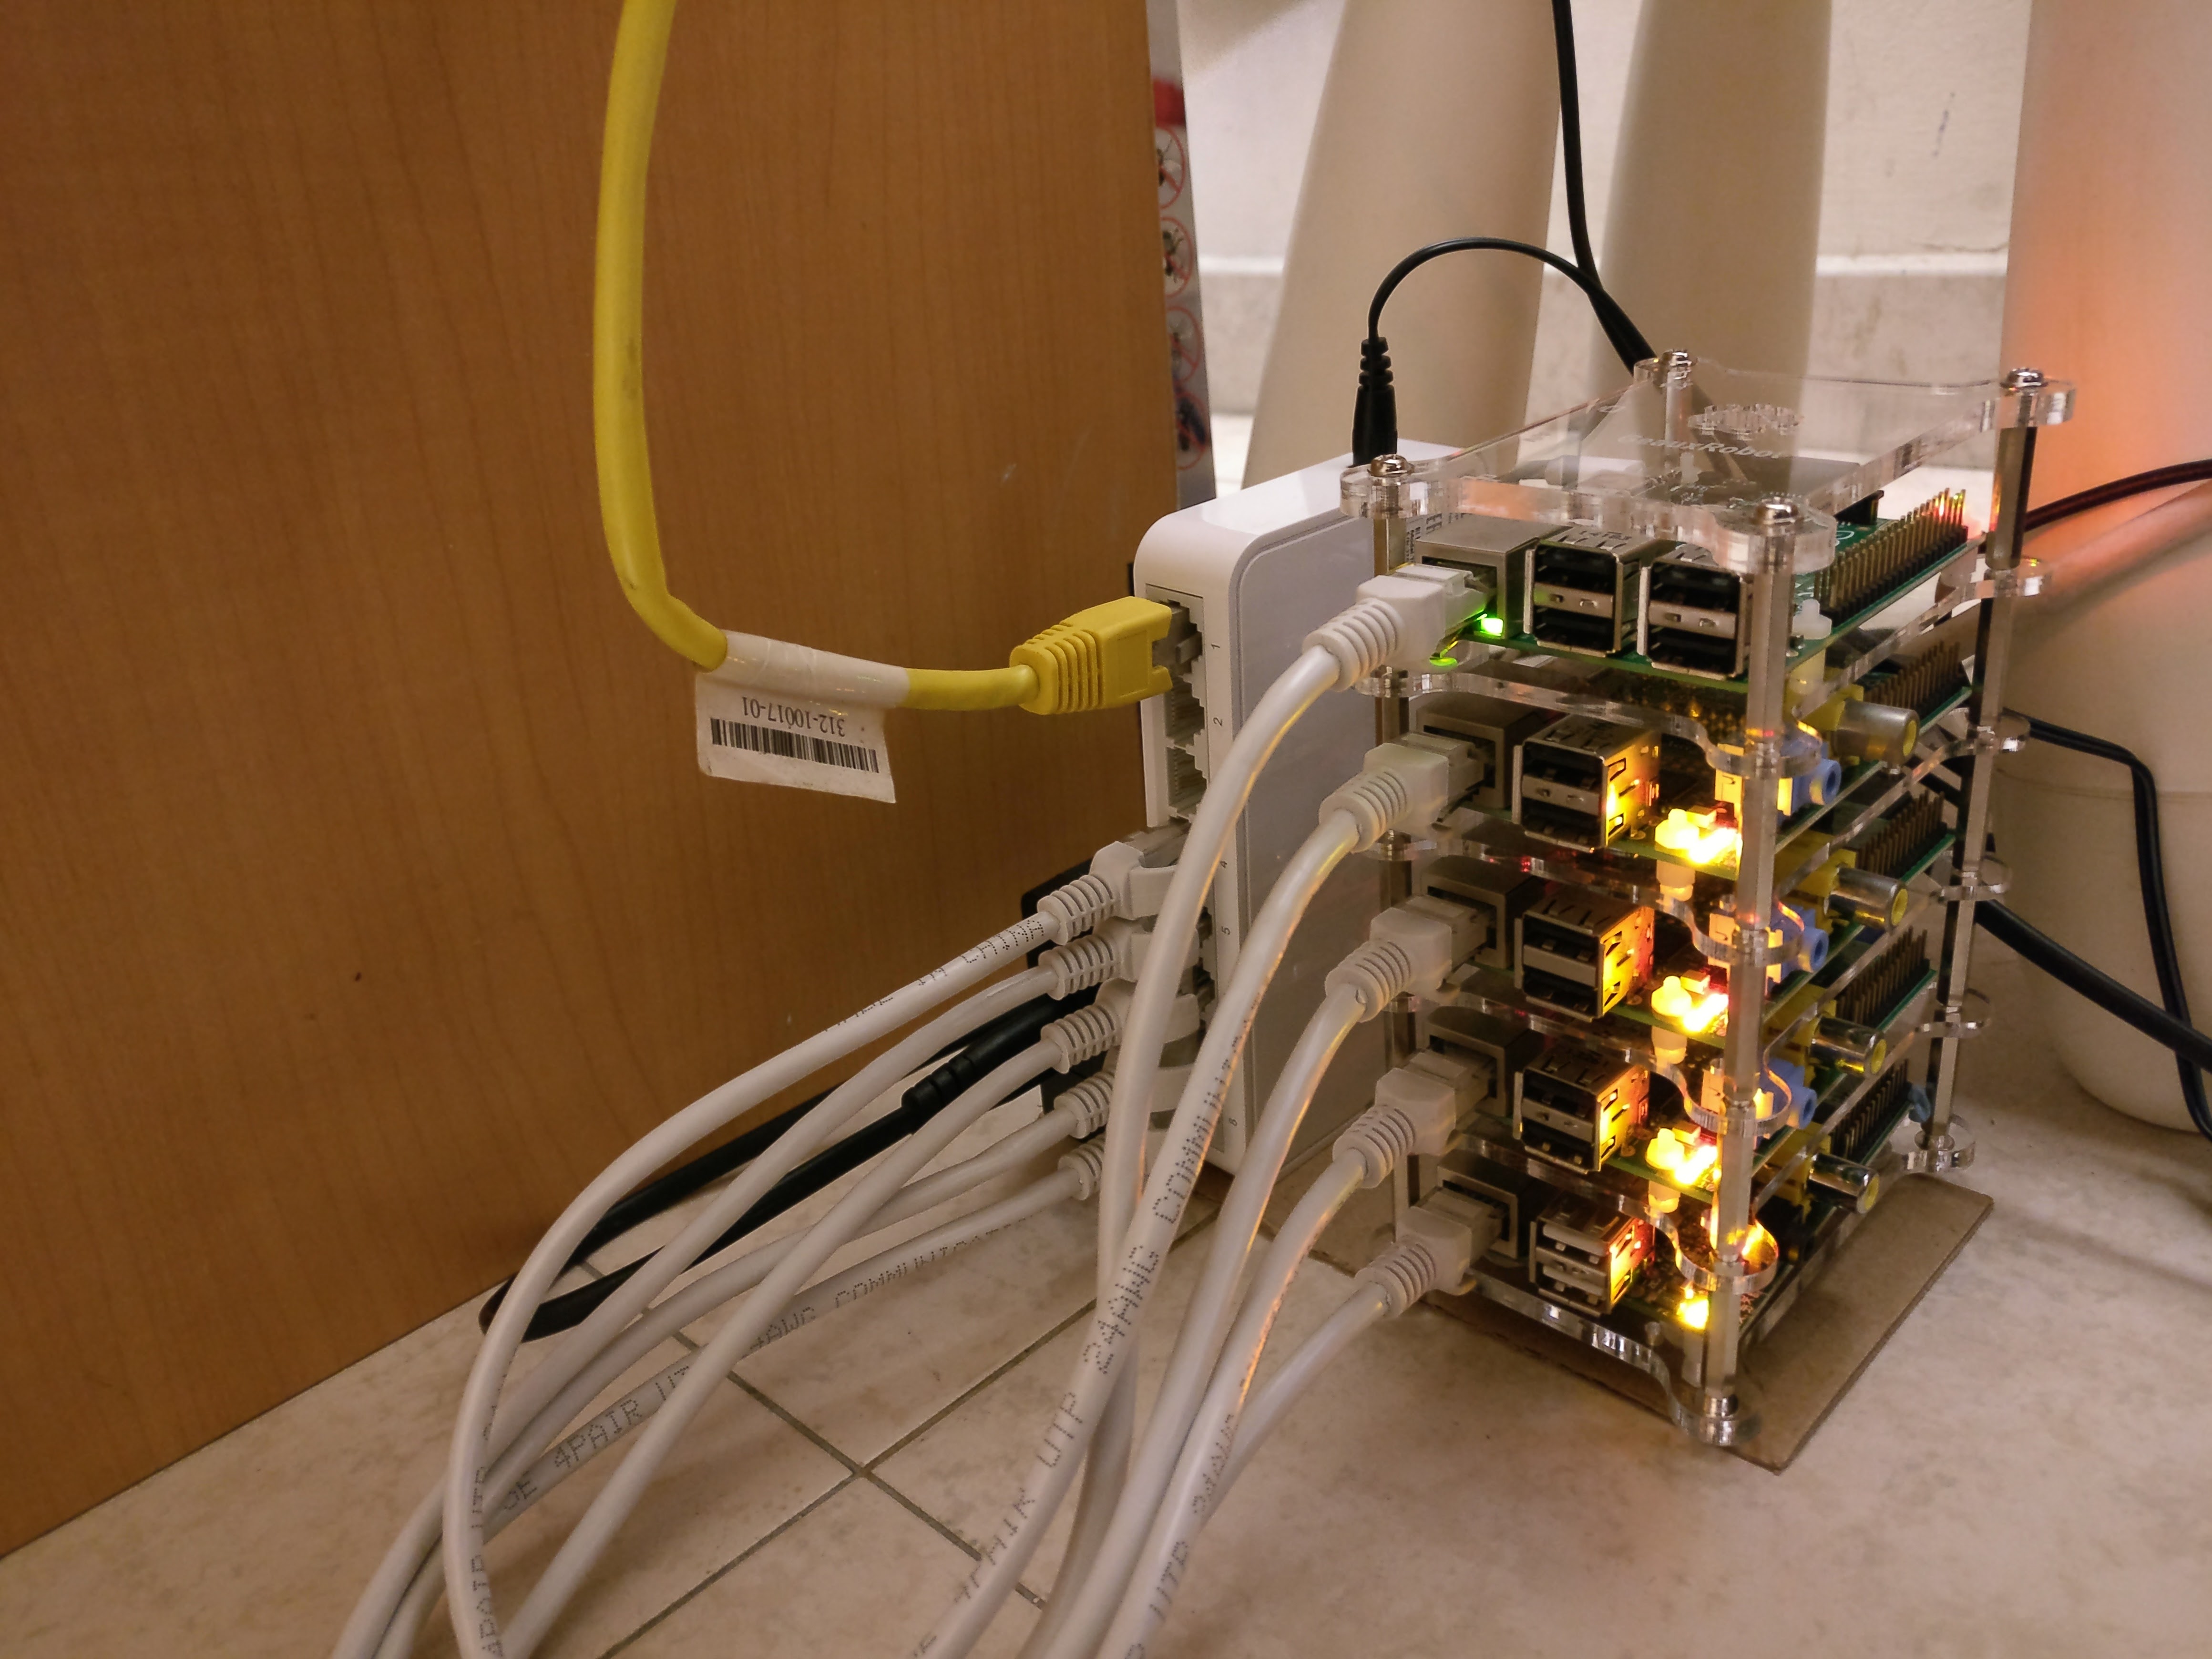
Not too long after, my neat freak tendencies got the better of me and I bought a laser-cut acrylic stacking-rack for the cluster. There's always an excuse for not enough compute but there's no excuse for an unsightly cluster.
Now you may be asking, how much did I spend in total to build Octopi?
All in all, I spent $183.34 building this cluster. Here's the cost breakdown for each component:
Parts List
| Item | Qty | Cost (SGD) | Cost (USD)* |
|---|---|---|---|
| Raspberry Pi Model B+ (Used) | 1 | S$25.00 | $18.04 |
| Raspberry Pi Model B (Used) | 4 | S$80.00 | $57.74 |
| Anker PowerPort 5 40W 5-port USB Charger | 1 | S$32.58 | $23.51 |
| TP-Link TL-SF1008D 8-Port Ethernet Switch | 1 | S$20.00 | $14.43 |
| Cat 5e 30cm cable | 5 | S$2.50 | $1.80 |
| Cat 5e 1m cable | 1 | S$2.00 | $1.44 |
| MicroUSB charging cable | 5 | S$15.00 | $10.83 |
| 8GB Class 10 SD Card | 4 | S$24.00 | $36.09 |
| 16GB Class 10 MicroSD Card | 1 | S$10.00 | $36.09 |
| Amazon cardboard box | 1 | Free | Free |
| Rubber band | 4 | Free | Free |
| 1 GeauxRobot Raspberry Pi 5-Layer Dog Bone Stack | 1 | S$41.55 | $29.99 |
| Total | S$254.05 | $183.34 |
* SGD/USD exchange rate is 0.72172 as of the time of writing
1 Optional but handsome
And that was the story of how I broke my wallet in university 3 years back.
Provisioning pains
For a good half a year, the furthest extent I went was flashing the SD cards with Raspbian. Essentially, the cluster was a $180 kinetic sculpture on my desk, consuming 15W to produce heat, in an already hot tropical climate, and light, strong enough to disrupt my sleep cycle.
Then one day, I accumulated enough guilt to motivate myself to stop wasting electricity and start putting the cluster to work for me, and it was only then I started setting the cluster up proper.
Initially, I tried provisioning the cluster one by one. With Raspbian already set up, the next thing I had to do was to enable password-less, secure communications from my local machine to the cluster and between cluster nodes. At first, that task sounded simple but I quickly realized how painful this process was.
To give you some context, here are the steps I had to follow and repeat 5 times to enable password-less authentication from my machine to each node:
- Install vim, a text editor
- Copy my machine's public key into the authorized_keys file
- Disable password authentication by editing ~/.ssh/config
- Generate a public/private key pair on the node in ~/.ssh/id_rsa
- Copy the node's public key and host key into a text editor on my machine
After completing the above 5 steps, in order to enable password-less authentication between each node, I had to login to every node again to:
- Paste the public key of every other node except itself into the authorized_keys file
- Paste the host key of every other node except itself into /etc/ssh/ssh_known_hosts
Those last 2 steps were what I'd call, n2 complexity, where the number of manual operations grows to the square of the number of nodes. 😱
I ran out of gas by the time I reached the third node.
Enter Ansible
I searched around on how I could automate the provisioning steps above, and it was then I picked up Ansible, an open-source, software provisioning, configuration management, and application deployment tool. Ansible allows one to write Playbooks, which are essentially a list of tasks in intuitive yaml syntax, to be run on a pre-defined list of target machines.
All of the above tasks that took me 2 hours was done in 10 minutes with a single command:
$ ansible-playbook octopi.yml
This is how I my first Ansible playbook looked like: octopi.yml
---
- hosts: octopi
  vars:
    ansible_user: pi
    comment_re_prefix: '^[# \t]*'
    # SSH Key Configuration
    security_ssh_keygen_algorithm: 'rsa'
    security_ssh_keygen_bits: '2048'
    security_ssh_keygen_password: ''
    security_ssh_admin_key: ~/id_rsa.pub
    # SSH Configuration
    security_sshd_config_path: /etc/ssh/sshd_config
    security_ssh_port: 22
    security_ssh_password_auth: "no"
    security_ssh_permit_root_login: "no"
    security_ssh_usedns: "no"
    security_ssh_permit_empty_passwords: "no"
    security_ssh_challenge_response_auth: "no"
    security_ssh_gss_api_auth: "no"
    security_ssh_x11_forwarding: "no"

  tasks:
  - name: Install common packages
    become: yes
    apt:
      name: vim
      state: present

  - name: Check if ssh key exists
    stat:
      path: '/home/{{ ansible_user }}/.ssh/id_rsa'
    register: security_ssh_key_stat

  - name: Create .ssh directory
    file:
      path: '/home/{{ ansible_user }}/.ssh/'
      state: directory

  - name: Generate ssh key
    command: 'ssh-keygen -t {{ security_ssh_keygen_algorithm }} -b {{ security_ssh_keygen_bits }} -N "{{ security_ssh_keygen_password }}" -f /home/{{ ansible_user }}/.ssh/id_{{ security_ssh_keygen_algorithm }}'
    when: security_ssh_key_stat.stat.exists == False

  - name: Slurp public keys from all nodes
    slurp:
      src: '/home/{{ ansible_user }}/.ssh/id_{{ security_ssh_keygen_algorithm }}.pub'
    register: security_ssh_key_slurp

  - name: Copy public keys of all nodes into authorized_keys
    authorized_key:
      user: '{{ ansible_user }}'
      state: present
      key: '{{ hostvars[item].security_ssh_key_slurp.content | b64decode }}'
    with_items: '{{ ansible_play_hosts }}'

  - name: Copy local public key to authorized_keys
    authorized_key:
      user: '{{ ansible_user }}'
      state: present
      key: "{{ lookup('file', security_ssh_admin_key) }}"

  - name: Slurp host keys from all nodes
    slurp:
      src: '/etc/ssh/ssh_host_{{ security_ssh_host_key_algorithm }}_key.pub'
    register: security_ssh_host_key_slurp

  - name: Insert all nodes into global known_hosts
    become: yes
    known_hosts:
      name: '{{ item }}'
      key: '{{ item }} {{ hostvars[item].security_ssh_host_key_slurp.content | b64decode }}'
      path: '/etc/ssh/ssh_known_hosts'
      hash_host: '{{ security_ssh_hash_known_hosts }}'
      state: present
    with_items: '{{ ansible_play_hosts }}'

  - name: Secure SSH configuration
    become: yes
    lineinfile:
      path: '{{ security_sshd_config_path }}'
      regexp: '{{ item.regexp }}'
      line: '{{ item.line }}'
      state: present
    with_items:
      - regexp: '{{ comment_re_prefix }}Port'
        line: 'Port {{ security_ssh_port }}'
      - regexp: '{{ comment_re_prefix }}PasswordAuthentication'
        line: 'PasswordAuthentication {{ security_ssh_password_auth }}'
      - regexp: '{{ comment_re_prefix }}PermitRootLogin'
        line: 'PermitRootLogin {{ security_ssh_permit_root_login }}'
      - regexp: '{{ comment_re_prefix }}UseDNS'
        line: 'UseDNS {{ security_ssh_usedns }}'
      - regexp: '{{ comment_re_prefix }}PermitEmptyPasswords'
        line: 'PermitEmptyPasswords {{ security_ssh_permit_empty_passwords }}'
      - regexp: '{{ comment_re_prefix }}ChallengeResponseAuthentication'
        line: 'ChallengeResponseAuthentication {{ security_ssh_challenge_response_auth }}'
      - regexp: '{{ comment_re_prefix }}GSSAPIAuthentication'
        line: 'GSSAPIAuthentication {{ security_ssh_gss_api_auth }}'
      - regexp: '{{ comment_re_prefix }}X11Forwarding'
        line: 'X11Forwarding {{ security_ssh_x11_forwarding }}'
You can get this Ansible playbook at my cluster-ansible-playbooks GitHub repository. I have also written other useful tasks such as disabling the HDMI to reduce the power draw (written out of guilt after having wasted 65kWh over 6 months by letting the cluster idle) or disabling swap to extend the SD card's lifespan.
 ikaruswill
My foray into Ansible was inspired by Jeff Geerling's blog on his Pi Dramble cluster where he runs Drupal on a cluster of 6 Raspberry Pi 2B. I highly recommend checking his site out if you're just getting into Ansible.
Ansible was my greatest discovery back then and still remains very much relevant today, not just in my newest cluster but also in my career.
After the trauma from provisioning the cluster, I took a break of several weeks to recover (and study for my exams) before starting work on hosting a Drupal blog. I did not end up using the blog as the university network was firewall-ed and not accessible from the outside world not to mention I was a lazy student then. Nevertheless, it was definitely a worthwhile project and I'll explain why with my next post in this series.
Should you build this cluster?
This build is for you if you:
- Are on a really tight budget
- Are keen on getting your hands dirty to learn how to deploy applications from the ground up
- Have little to no experience with Linux and networks
- Wish to explore Docker
This build is not for you if you:
- Are already familiar with Linux basics
- Have experience hosting something like a LEMP stack
- Wish to learn Kubernetes
Should you choose to build this cluster, there are some things that you should be aware of before starting.
What you should know
There were quite a number of limitations when it comes to using Raspberry Pi Model 1B, most notably, the single-core 700MHz processor which may prove to be under-powered for many tasks.
Notwithstanding, I shall list out the other points that I wished I was aware of before I built it.
Elevated power consumption
The standby power consumption of Raspberry Pi Model 1B is more than 3x higher than that of the Model 1B+ (at 3.5W vs 1W) due to a flaw in the design of their power management hardware (Wikipedia). Even though 2W may not sound like a huge difference, it stacks up quickly with 4 of these running 24/7. Therefore, it's almost always advisable to get the Model 1B+ and newer models.
Limited storage speed
The storage performance on the Raspberry Pi Models 1 through 3B+ is suboptimal. Even if you were to use the best SanDisk Extreme Pro+ SD card intended for videography usage, it would perform the same as when a standard Class 10 SD card was used. Even on a Class 10 SD card, the I/O (read/write) performance is severely bottlenecked by the single USB 2.0 bus shared between the Ethernet Port, the SD card slot and all USB ports.
USB 2.0 is at its core, a 480mbps half-duplex connection, enabling full speed communication in only one direction at any instant, effectively halving the bi-directional communication bandwidth to 240mbps. Ethernet on the other hand, is 100mbps full-duplex, allowing 100mbps bi-directional data transfer at any point in time.
To put things into perspective, in a typical large file download operation, 480mbps of USB 2.0 theoretical bandwidth (~400mbps actual due to protocol overheads) is shared between the I/O operations to your SD card, USB flash drive, and receive/transmit operations to the Ethernet cable.
| Operation | Read bandwidth | Write bandwidth |
|---|---|---|
| Actual available bandwidth | 200Mbps | 200Mbps |
| Ethernet maximum utilization | -100Mbps | -100Mbps |
| USB typical utilization | -25Mbps | -25Mbps |
| Available for SD Card | 75Mbps | 75Mbps |
Tabulating the bandwidth utilizations, we see that only 150mbps of actual bandwidth is available to I/O operations, amounting to a maximum of 9.38MB/s simultaneous read and write speeds, which is slightly below the maximum write speed of 10MB/s in the lowest tier Class 10 U1 SD cards.
This is quite a hotly debated issue in the community albeit not very visible to those outside. The justification given by the Raspberry Pi foundation was that using a single shared USB bus keeps the manufacturing costs low, which I agree as most use-cases except mine are not demanding on the I/O aspect.
My two cents
Despite the restrictive hardware of a single 700MHz CPU and 512MB of RAM per node a surprising number of things can be learnt from it. Besides, most of the time, unless you go into the realm of streaming content and downloading large files, you will not hit the I/O bottleneck.
Though instead of 5 nodes, I would recommend building a cluster with 3 nodes as the performance gain of two additional nodes is insignificant as compared to the additional investment it requires. If this is your first exposure to Linux, definitely build yourself one!
What's next?
In my next post in this series, I shall introduce the Kraken cluster which has since replaced the Octopi cluster, so stay with me!